TV ad blog

Over the past weeks me and Jackson have been in contact with an animation team from SAE Brisbane in hopes to create music for an advertisement as part of their assignment project. Our first contact was through Blue Clan and a contact was established in the early weeks of the trimester.

In terms of roles, i decided with managing the audio/production aspect of the project whilst Jackson worked at managing public relations with the animation team. We did not have direct influence over the actual advert but we did send them a skeleton track where only the basic synth and drums were available in which they edited the video towards.

The advertisement was for a futuristic smart-phone that spanned 15 and 29 seconds long with a 8 bar intro. This 8 bar intro served as an establishing shot for the phone with the chorus being used to showcase the applications and features.

Planning was rocky to begin with since we did not do a pre-production plan and nailing an idea was rather slow. However we decided to explore deep house as a genre since it filled out the criteria for a futuristic setting. We decided to keep the music itself rather simple due to the sleek and clean design of the ad.The brief asked for an up-tempo feel and so with the 125 bpm tempo we set, this filled the criteria.

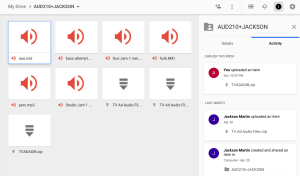
Me and Jackson collaborated through the use of Google Drive, and was instrumental in sending each stems and midi to work with. We used different DAW’s for our project with Jackson using Ableton and me using Logic Pro 9. We decided upon the use of the same sample rate of 48kHz to get a uniform setting when transferring files around.

Ive learnt a lot in this task such as scheduling meetings and effectively communicating with other disciplinaries about production terms in both audio and animation. Ive also learnt about the processes of animation such as providing animatics and audio alignment with video as this was all new to me.

Here is the track on its own.

Screen Shot 2015-05-06 at 12.15.37 pm

BRIEF

Hi Jackson & Adib,

I have here the brief that you needed from us. There isn’t really much to it, we just need audio for 29 seconds like we have spoken about. Details below.

Audio required for Futuristic TV ad.

Total length: 29 seconds

Theme: Upbeat, futuristic

DUE: Week 13 – 04/05/2015

We plan on having an introduction scene of the phone, and then moving into the apps. A little intro before the beat would be good, we will tailor the animation to suit the music as we have still yet to create some of the visual displays for the apps.

Animators:

Nico De Wet – 109658@student.sae.edu.au

Luke Middleton – 111110@student.sae.edu.au

Thanks,

Nico De Wet

Group Project – Collab Track Processes

For one of our collaborative tracks we decided to experiment with the mood of Relaxed/Calm. For starters we laid out a basis for our song in pro-tools using live instrumentation’s and moved on to logic for more midi intensive tracks such as the vocal chops and the percussive composition.

For instrumentation’s, we decided upon the use of a bass guitar and a e-piano as a basis of the song and we avoided the use of heavy processing such as distortion or reverb since we did not want to over-burden the harmonic content with FX’s and lose its personal touch.

A bass was later added and is the main live melodic content and lower frequencies we had for the track. We chopped up varying lengths of bass shots and ordered them around in midi. Since most of us aren’t musicians, this was a great way to get the bass on time and to even change the notes if we wanted to change the progression later on.

The samples that we used can be read from a previous blog post

https://dibsaudio.wordpress.com/2015/04/28/equipment-choices/

We decided to further add a more “human” touch to the track and so, we recorded vocal samples that were then insterted into EXS24 to experiment on. We chose 2 percussive sounding samples and a vocal vowel note that were produced by Jordan.

  • For the the breathing sound we decided upon the use of heavy hall reverb to change it into a white noise transition.
  • For Jaleel’s pop sound we decided upon the use of reverb and we used it as an anacrusis for the chorus.

DRY

We recorded Jordan’s voice in varying lenghts and used them for a choir-like vocal effect which acts as a pad. We also chopped the the sibilance of the vocals and edited them to sound like synth pluck. Both of these musical notes were post processed using Logics Vocal changer VST where the pitch and the formants were increased to achieve a female-like vocal effect. The wet was increased to 100% as we only wanted the processed vocals since we were going for a calm and gentle voice which went well with the track. Reverb was then added to the track to have a constrast from the dry melodic content we had at the time.

The whole track was first recorded into pro-tools but was later put into Logic Pro X due to the simplicity of midi editing since most of our tracks featured use of midi tracks and due to the off-timing nature of our horrible playing skills.

Later on to the songs cycle, we decided upon the use of foley sounds further add a natural touch to the track and so i inputted the sound of waterfall which i had recorded in the past and inputted it unto the track. We used the natural water sound as a white noise substitute and applied a low-pass filter as a sweep.

Here is the final render of the track including all the aspects ive mentioned in this blog.

Drum Sampling (EXS24)

 For our project we decided upon capturing our own percussion samples to be used within our library music. This is my process upon inputting them into the EXS24 for sampling purposes.

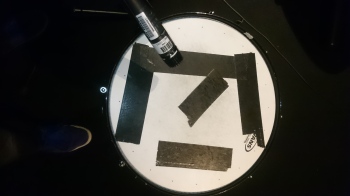
Snare – SM57(Close Mic)

DSC_0223

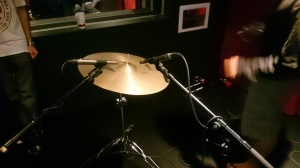
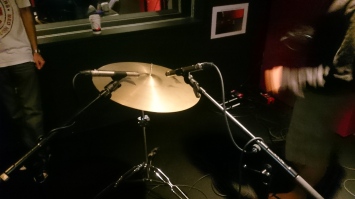
Hats/Cymbals – Behringer C2 (Pair)

DSC_0233

Kick – AKGD112 (Close)

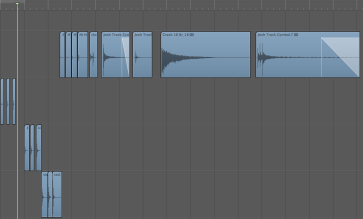
Here are the samples that we gathered as a group that i used for the sampling task. Ive constructed a basic rhythmic section using the samples that I’ve inputted in EXS24. The samples were once again cut from the transients so that it would trigger automatically without a delayed start. Ive also faded out long cymbal sizzles so that it would not play for a long duration than it needs to since the properties are set to 1shot.

Screen Shot 2015-05-02 at 12.20.07 AM

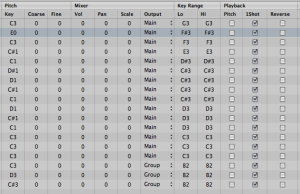
Ive inputted the samples into EXS24 via regions and I’ve set them all to 1shot samples. For each percussion I’ve set them to their relative groups so that when playing a kick, the relative kick samples would play depending on the velocity. Ive set the samples to not pitch since i had already fixed the kit to my preference and was not meant to have melodic properties.

Screen Shot 2015-05-02 at 12.27.24 AM

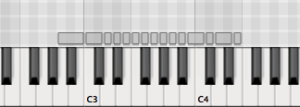
Ive laid out the kit to be triggered with C3 being the kick and D3 being the snare. The rest of the cymbal shots were put into stray keys from D# to G. Ive also set the samples to be velocity triggered using the settings below spacing them out depending how many different samples were captured for one instrument.

Screen Shot 2015-05-02 at 12.39.09 AM

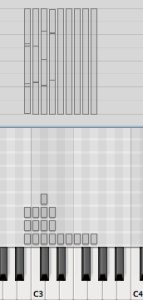
This track utilises all the recorded samples and also includes different velocities from the different recorded samples. The composition is set to 190bpm and incorporates a 4/4 time signature. Ive decided to follow the style of an aggressive indie rock composition making use of double pedal techniques and fast hi-hat patterns.

Screen Shot 2015-05-02 at 2.31.45 AM

Ive also seperated the different percussions into different tracks so that i could process them using inserts. Different compression settings were used on different tracks to get a uniform level between all the samples.

Screen Shot 2015-05-02 at 2.20.45 AM

Broadcasting Frameworks

There are a plethora of frameworks used within the audio field from music CD pressing all the way to Broadcasting standards. I have chosen broadcasting as a basis for this research since it is well documented and is still extensively used worldwide. However, it is worth noting many media accessible regions follow different standards and use varying degrees of guidelines and laws to differentiate themselves from other regions that follow these practices.

A common practice used within the audio industry is the use compression to increased the “perceived loudness” of an audio track. Compression is commonly used in any professional sound recording and mastering studios whether it is via outboard gear or software, the principal doesn’t change. To sum it up, compression is used to increase the average level of sound, effectively amplifying quiet sounds and reducing loud sounds. On top of this, audio engineers are also forced to abuse peak limiting, clipping and the other tools within the dynamics family, not to make broadcasts sound better but to make it louder, thus more attention grabbing.

The concurrent problems with the compression of dynamics is the inconsistency between different broadcasters,labels and institutions of what is deemed acceptable and what governing frameworks are used for commercial purposes. The number one source of complaint from consumers the lack of uniform loudness when watching broadcasted content. Over the past the issue of sudden leaps in loudness between ads, station promos and TV programs startled viewers.

With a pocketful of technical jargons when handling audio levels, the three most used abbreviations are LKFS, LUFS and LU. These terms are basically similar and all aim to describe the same thing.

  • 1 unit of LKFS (Loudness K-weighted Full Scale) = 1dB (US)
  • 1 unit of LUFS (Loudness Units Full Scale) = 1dB (EU)
  • 1 unit of LU (Loudness Units) = 1dB(International)

The  difference in the usage of these terms is the localisation. Usually, target levels across the different broadcasting standards only differ marginally. The US for example, employs a target level of -24 LKFS whereas in Europe (EBU R128) the target level is -23 LUFS. However in order to aim for a more uniform number, a relative measure has been defined which is the LU. Regardless of whether it is -24 LKFS or -23 LUFS, the target level is both equivalent to 0 LU.

In Australia, it is common practice to follow an “Operational Practice” guideline for broadcasting standards. For the longest time, OP48 was used in Australia as a guideline for the measurement of sample peak measurements, which was the actual reading of the number of samples in an audio signal.

OP 48 is based on VU and Peak levels which is more of a measurement of the electrical signal of the audio rather then how loud the perceived audio actually sounds to the listener. Essentially, by slapping a multi-band compression and EQ you could make the sound seem louder while keeping in check with the OP48 requirements. Also it is important to keep in mind that equalisation does not take into the metering and so the boost of frequencies in which the ear is most sensitive to (1kHz to 5kHz) was not taken into consideration.

However as of January 1st 2013, A new OP 59 requirement came into effect in Australia and New Zealand to move Australia into line with the the US, Europe and many other countries in the world. This is a step further from the aforementioned OP 48 in the sense that audio will now be measured based on the average perceived loudness of the soundtrack rather than exploiting the use of signal processing. true-peak measurement was invented with this legislation and this measurement is considered to be the perceived loudness volume and has replaced the old sample peak measurements.

However, there is a system developed by The International Telecommunication Union or ITU which uses an algorithm that can measure a human’s perceived loudness. This system is commonly referred to as ITU-R BS.1770 and as of lately with the recent OP 59 requirement, the current implementation of this system is the ITU-R BS.1770-3. By using a meter that follows the ITU-R BS.1770-3 you can get a quantitative measure of the loudness of an audio track.

When taking music used within broadcasting into consideration,the music can vary in different styles and genres. In order to have a uniform level in sonically different genres such as Classical Music to Rock Music, is a tool used within broadcasting called “Gates”. A gate pauses the true-peak meters analysis when it hits below the threshold of -10LUFS.

All of these processes are definitely a step in the right direction for broadcasting standards and will hopefully address the issue of inconsistent levels between ads, station promos and TV programs. Since the use of true-peak mixing processes sound engineers can be more dynamic when creating soundtracks and that from now on there is more consistency in average loudness, regardless of the difference in regulations that are in use.

References

http://www.tcelectronic.com/loudness/loudness-explained/

http://www.sandymilne.com/op-59-and-loudness-standards-for-australian-tv/

http://op59.sounddeliveries.com/Info/FAQ

http://www.freetv.com.au/media/Engineering/Free_TV_OP59_Measurement_and_Managemnt_of_Loudness_for_TV_Broadcasting_Issue_2_December 2012.pdf
Bass Sampler Patch

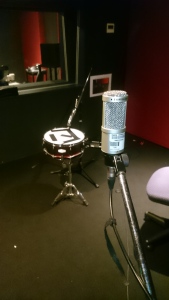
For this sampler patch i recorded long bass shots using an electric yamaha bass. The Signal was fed unto a BA500 preamp via DI. Ive recorded bass shots from G#3 to G#4 that lasted roughly 1 second long and inputted it to EXS24.

Screen Shot 2015-04-29 at 12.47.00 PM

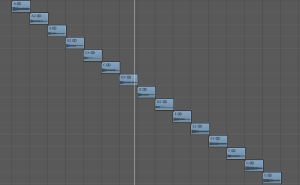
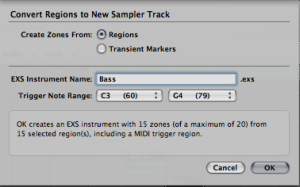
Each shot was cut down via transients and ordered from lowest to highest note. I then converted them into a sampler track and created zones via regions.

Screen Shot 2015-04-29 at 12.23.31 PM

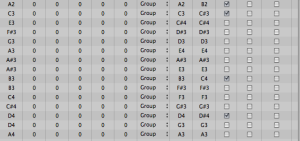
In EXS24, ive aligned them in order and pitched some of the notes that such as A2 to B2 to make use of the pitch function within EXS24. Ive also switched off 1 shots since i wanted some notes to vary from short plucks to long notes for musical variation.
Screen Shot 2015-04-29 at 12.34.54 PMScreen Shot 2015-04-29 at 12.35.00 PM

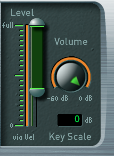
Ive also set the velocity to be switched on via the level range within EXS24. This lets me experiment with dynamic variety within the midi notes.

Screen Shot 2015-04-29 at 12.46.31 PMScreen Shot 2015-04-29 at 12.46.42 PM

Screen Shot 2015-04-29 at 1.21.31 PM

Here is the outcome from the Bass sample patch.

Equipment Choices

DSC_0219

For the past few weeks we have planned on gathering equipment that we wanted to use such as instruments and gear for our library music production.

Our pre-production plan helped us to have a set list of equipment and mic placements so that we could quickly get set up and plan for recording sessions for the time ahead.

Mic’s used

Percussions (SM57 Dynamic)

Ambient Mic (Behringer C2 Pair & AKG D112)

Vocal Mic (U87 Condenser)

Guitar Amp Mic (C414)

Equipment used

Guitars: Epiphone Les Paul Guitar, Yamaha Bass

Midi: Akai MPK49 (keyboard)

Gear: DI Box, Raven JLM Preamp (BA500,LA500A)

Mic Stand & Music Stand

XLR / ¼ Jack Leads

For certain percussions we have decided upon sampling them such as snares and cymbals to get a more live feel and to produce our own samples that we can work with in the near future.


DSC_0223

DSC_0222

For Jordans track we incorporated the use of an ambient mic and a close range mic to capture percussions such as a snares and some cymbal scrapes. For more eerie ambient tracks such as Josh’s we chose more controlled ways of handling percussion properties such as the timbre and lenghts. We hard some very weird sounds such as cymbal hits and cymbal scrapes to capture some more metallic sounds for Josh’s track.

We decided on some microphone placements such as the X-Y on the stereo tracks and the standard Dynamic and Condenser setup to capture more aggressive transient sounds. These tracks were routed through a junction box into the LA500A preamp.

DSC_0233

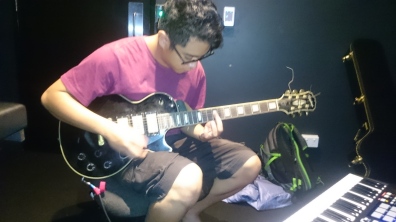
For our library music project one of the main instruments we used were an electric guitar and bass. For that we used the Raven BA500 pre-amp to capture a direct input signal into our DAW. We used this method to get a clean and un-affected sound, however to reach our desired emotion/mood for this track we used Guitar Rig by Native Instruments to custom make the different sounds for the different guitar and bass tracks.

We wanted to use Outboard gear such as FX pedals to get a more analog sound but we decided on the use of software rigs to emulate it since we could switch between different sounds on the fly and experiment with different moods.

DSC_0218

https://drive.google.com/open?id=0B4rbpZY7giEcem5wSzdZM29wWE0&authuser=0

The sounds that we recorded ranged from musical progressions to weird string scratches. For the most part, the built in preamp worked as intended but some problems such as hardware latency caused some recordings to be difficult but for the most part, it was solved after we froze some tracks or initiated a system restart.

We also wrote a risk assessment plan incase any problems did arise which was fortunate since a guitar string snapped and we quickly replaced it. Another issue that arose was the 1/4 input jack was loose which created cuts and crackles in the recording. However after trouble shooting and pre-planning we did prepare and the replacement of cables was quickly resolved.

DSC_0217

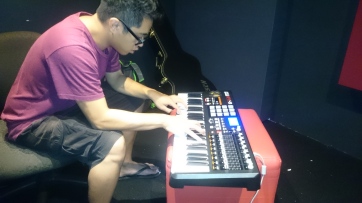
We have also used a midi keyboard to input midi data for some of our tracks. Most notably we used the keyboard to capture musical ideas that could be transferred between the piano and guitar so that composing music would be easier since we had an overview of what feel of the music would sound like before actually layering any instruments into it. The midi keyboard was also used in conjunction with Kontakt 5 to provide some sampler instruments such as an e-piano.

Some problems also arose since kontakt is generally a taxing on the CPU, we frozen the track before creating new track so that there were no crackling or input latency from inputting more midi tracks.

Since most of us arent muscially trained and so, we knew the use of midi would be a quick way to jot ideas and we had even taken pictures of chords so that we knew the progressions we were playing incase we ever needed to re-record. This was used in both the guitar and keyboard so that we could get visual representation rather than writing the chords down since it was faster and easier to read.

Below is Jordan’s track which incorporates all the aspects above using both in the box and outboard gear to create the track.

Sampling via EXS24 (Rubber Bands)

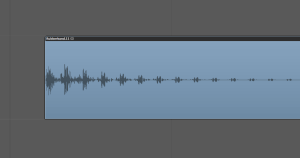
For sampling, i have decided to record the sound of a rubber band being flicked.The sample was recorded using a U87 condenser and inputted it using logics native EXS24 sampler. I have recorded the sounds at different velocities so that i will get a variety of samples to work with. I have also faded the clips out so that there are no clipping towards the end of the clips.

Screen Shot 2015-04-26 at 1.01.06 AM

I have also cut the sample to its nearest peak transient so that when i trigger the sample, it plays instantaneously and does not play the silence preceding the sample. This will make sure when placing midi, the sample will play in time on the grid when it is quantised and not start seconds after it is triggered.

Screen Shot 2015-04-25 at 11.51.22 PM

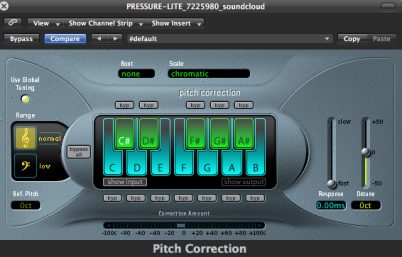
I have used Logics pitch correction VST to snap the relative sample to its nearest pitch and have also used it to identify the pitch for easy referencing when i am inputting the sample into EXS24.

Screen Shot 2015-04-25 at 11.48.34 PM

According to the Pitch correction, the rubber band samples are at C# so i will take that into mind when i am loading them up into EXS24.

Screen Shot 2015-04-25 at 11.52.09 PM

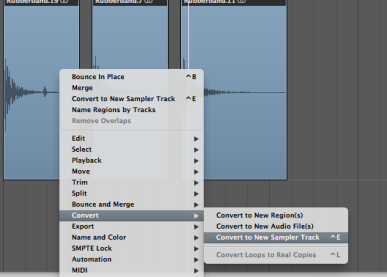
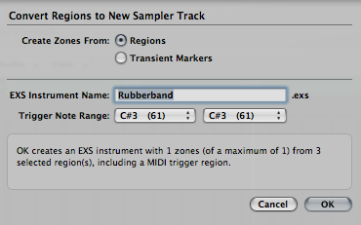
I have decided to use regions as individual samples since i have already cut them up to the appropriate lengths for sampling.

Screen Shot 2015-04-25 at 11.52.30 PM

I have switched on pitch and 1 shot on the settings so that the samples can be pitched and also the samples wont cut off when the midi length does not play the overall duration.

Screen Shot 2015-04-26 at 1.42.43 AM

I have set the midi to cover 2 octaves with C3 being the middle C. This gives me pitches to play with whilst inputting midi data. I have decided on 2 octaves since it was an appropriate amount of keys to play with, without severely artifacting the sound to inaudible ranges.

Screen Shot 2015-04-25 at 11.57.27 PM

I have also changed the samples so that it is velocity triggered via a set amount of range. The lowest range will play the softest sample whilst the a higher velocity will the play the louder sample.

Screen Shot 2015-04-25 at 11.55.14 PM

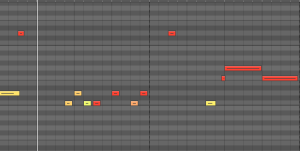
Here is the Midi i have inputted with this custom sampler.I have incorporated both velocity and pitch so that it the different variety of sounds can be played via a midi keyboard.

Screen Shot 2015-04-25 at 11.59.39 PM

FM Synthesis pt 1 (Deep House Bass) try2

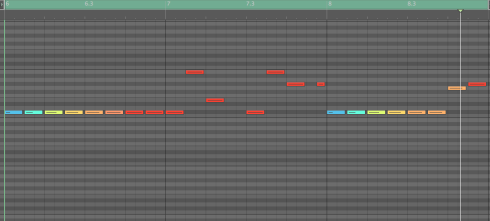
Screen Shot 2015-04-20 at 3.15.10 pm

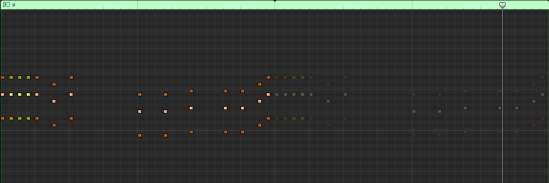
For this patch i wanted to recreate a deep house bass patch that had a quick attack and release times. For this i have inputted the midi above and i have set the tempo to 120 bpm. For the synth i have used Logic’s stock EFM 1 to achieve this.

Screen Shot 2015-04-20 at 3.15.52 pm

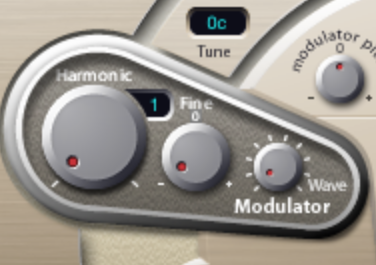
Ive wanted to keep the patch relatively simple and so i have set the patch to have only 1 harmonic as to not over saturate the sound and not deviate from the initial bass sound and not bring in too much harmonic content.

Screen Shot 2015-04-20 at 3.30.50 pm

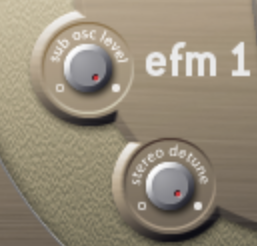
Ive also maxed out the sub osc level to bring in more sine wave sub bass to give the sound more lower sub bass frequency and to provide a fuller and rounder sound.Ive also set the stereo detune to max as to provide a more discordant and unison sound to provide more harmonic frequencies from the initial simple sound.

Screen Shot 2015-04-20 at 3.31.03 pm

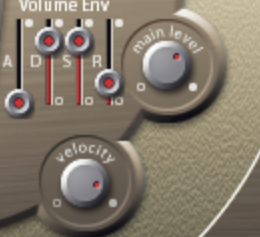
As for the envelope for the patch, i have set the attack to a fast setting to emulate the quick bass shots that is prominent in deep house. As for the decay and sustain, i have set them relatively high since most of the dynamics and harmonics come from the short plucky sound. As for the release ive set it relatively low to so that it doesn’t cut off too quickly or let it ring out for too long.

Screen Shot 2015-04-20 at 3.49.49 pm

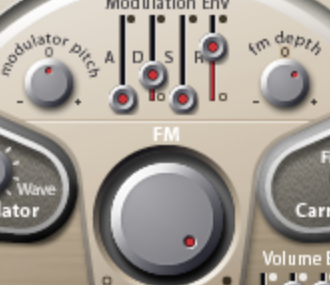
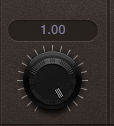
The modulation amount is controlled with the FM Depth knob and the ADSR envelope at the top. I have automated this to allow more FM modulation to pass as the midi sequence plays. The modulation envelope is set so that as more of the carrier signal is introduced, the release increases to change from the plucky sound into a longer release sounding bass shot. By turning the devolve the sound to a harsh, harmonically rich sound

FM synthesis Pt2 (Pad)

For this patch i wanted to recreate a pad that had evolves from a quick attack pluck synth to a more longer release pad synth. For this i have inputted the midi above and i have set the tempo to 120 bpm. For the synth i have used Logic’s stock Retro Synth and inputted FM as my synthesizer setting.

Screen Shot 2015-04-20 at 4.43.01 pm

To achieve the evolving sound i set out to do, i automated the harmonic setting within the synthesizer to bring in more harmonic content to the midi data.

Screen Shot 2015-04-20 at 4.42.51 pm

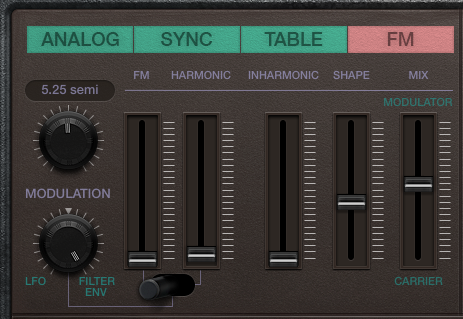
for this patch, i have set the FM value to low as a foundation for the sound and ive automated the harmonic content to bring in more frequencies. As for the inharmonic ive set it to zero as to not detune the overall sound and keep it musically correct.As for the shape ive set it to max to follow the envelope ive set. Ive also set the mix halfway between the carrier and the modulation to make the most of the FM synthesis.

Screen Shot 2015-04-20 at 5.22.32 pm

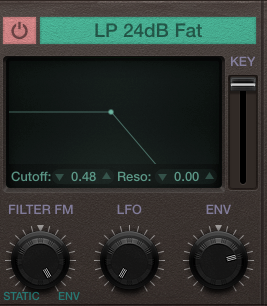
Ive set the EQ to a low pass shelf eq and filtered the FM via a filter envelope. This creates the pluck sound ive set out to achieve and it also reduces the more harsher higher frequencies as to not bring in more harmonic content that could detune the overall chords.

Screen Shot 2015-04-20 at 4.43.16 pm

Ive also inputted a chorus FX into the synthesizer which detunes the chords by very tiny cents to give a more unisoned sound and to harmonically enhance the notes i have already got without losing its musical intent.

Screen Shot 2015-04-20 at 4.43.19 pm

Ive also increase the sine levels to provide a sub bass layer to the sound to provide a more fuller sounding synth and to make it less dry.

Screen Shot 2015-04-20 at 4.43.21 pm

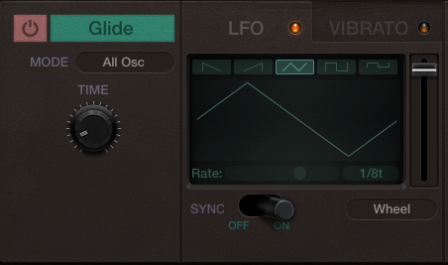
As for the carrier, i have inserted a triangle wave LFO to modulate the sound and to not make it sound flat.I have also synced it to my tempo as to not deviate the LFO into its own timing.Screen Shot 2015-04-20 at 4.43.41 pm

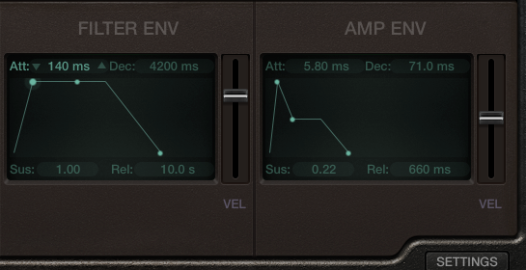
For the filter envelope, i have set the sustain higher than the AMP envelope since i wanted to evolve the sound to a have a higher sustain along the way. As for the AMP envelope, i have set the attack to give a very slow increase in amplitude before the full dynamic range is achieved. this also reduces the harsh noises that are produced from the very first second of the patch and gives it a more smoother sounding attack.

Screen Shot 2015-04-20 at 4.43.44 pm

Modelling Synth Pt 3 (Ocarina)

Making an Ocarina Sculpture

The ocarina is an ancient wind musical instrument that shares the same archetype of a flute. An ocarina is commonly an enclosed space with four to twelve finger holes and a mouthpiece that projects from the body

Screen Shot 2015-04-18 at 1.06.52 pm

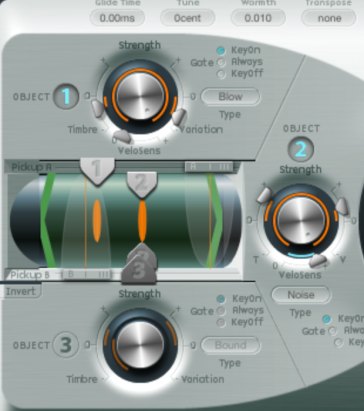
Ive used a Blow emulation since the instrument is inherently uses a flute structure to produce sound. Ive also added noise emulation to produce the overtones and noise from the breath to emulate a more realistic sound. Ive placed the pickups in the middle to capture the full spectrum of the instrument.

Screen Shot 2015-04-18 at 1.06.59 pm

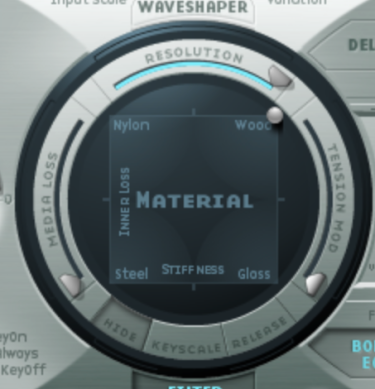
Ocarina’s are traditionally made from clay or ceramic, but other materials are also used such as plastic, wood, glass, metal, or bone. For this i chose to emulate a wooden ocarina since it is the most common material used today to commercially make one. A woodwind provides a very warm sound and is not as dynamically piercing as steel or glass.

Screen Shot 2015-04-18 at 1.07.02 pm

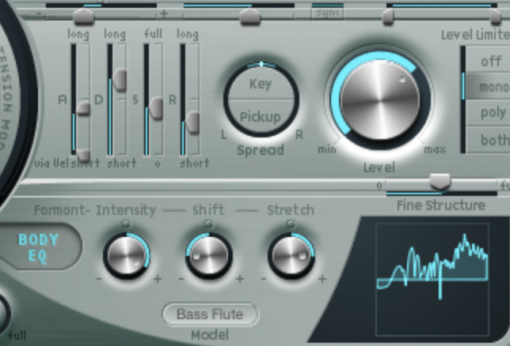
For the envelope the key factor is its long attack rates. The long attack gives it the dynamic factor that is common in wind instruments.Ive also set the decay higher than the sustain due to the nature that wind instruments provide the full dynamic in its first few seconds before the sustain hits. Ive also set the sustains mid way since it dies out due to how long players can draw breath and to prevent it to sound too synthetic. The release is set low enough to provide the the tail from cutting too quickly but also not sustaining too long.

Screen Shot 2015-04-18 at 1.07.08 pm

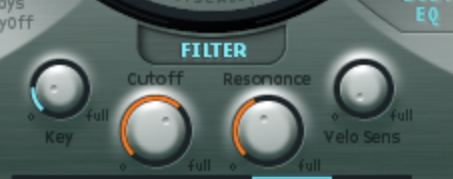
Ive also provided a low pass filter cutoff and boosted a resonance to lessen the higher frequency and a resonant boost to increase the mid frequencies that are created by that notch.

Screen Shot 2015-04-18 at 1.29.00 pm

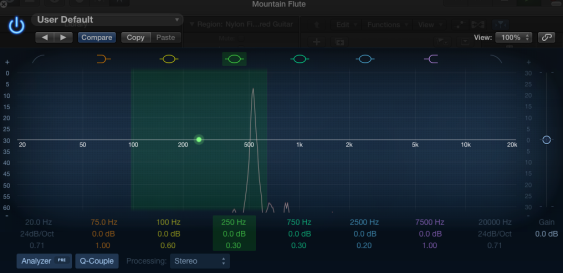
As shown from the EQ, the ocarina produces a very pure tone in nature very similiar to that of a sine wave. However there is a bit of harmonics present ever 200Hz which could be due to the material.