Modelling Synth Pt 2 (Classical Guitar)

Classical Guitar modelling on sculpture

Screen Shot 2015-04-16 at 2.55.01 pm

A classic guitar is an acoustical wooden guitar with six nylon guitar strings as opposed to the metal strings used in acoustic and electric guitars.

Screen Shot 2015-04-16 at 2.55.08 pm

For the envelope, i decided to do a quick attack to emulate a plucked playing style.For the decay and sustain, ive set them at maximum since most of the actual dynamics are at its fullest after the attack. For the release ive set it slow so that the tail does not cut short but also does not dwell for very long.

Screen Shot 2015-04-16 at 2.54.43 pm

For the pickups, ive decided upon pick as the main way of projecting the sound. since most guitars are often picked by hand or played using a plectrum.As for the second one, ive chosen disturb to emulate the hand hitting the fret and to capture a more live sound compared to just the dry synthetic sound.

Also the playing style is similar to a palm muted way of playing where most of the dynamics are cut short towards the sustain. This type of playing creates a very round warm sound compared to the playing open strings.

Screen Shot 2015-04-16 at 2.59.46 pm

Here is the spectral analysis playing C3 on the sculpture patch. According to the spectral analyzation graph below, the overtone frequency plays almost double its fundamental with some harmonic content triple its fundamental octave.

Screen Shot 2015-04-18 at 4.04.23 pm

(http://www.wseas.us/e-library/conferences/2009/prague/AMTA/AMTA04.pdf)

However reflecting from the synthesised sound, it does not emulate higher registers very well since there is no wooden body to resonant the sound and the almost sounds like a pure tone.

Modelling Synth – Marimba (Pt 1)

Emulating a Marimba with Sculpture

xylophones made from wood, metal or stone have different timbres. Different materials vibrate in different ways, so each xylophone’s timbre sounds warm, tinny, clunky or clear.

For this i wanted to emulate the sound of  hitting a wooden block at different velocities since Marimba bars are typically made of either wood or synthetic material. This sound is primarily warm and clear and for that i decided to set the material to wood and the resolution to full to capture most of the frequencies.

Screen Shot 2015-04-15 at 3.42.28 pm

Ive set the tension mod and media loss at a minumum due to the fact that most of the sounds produce from a marimba are quite pure in tone with the addition of harmonics and overtones that set the marimba apart from other mallet instruments.

The marimba, has its most significant overtone two octaves above the fundamental, at the fourth mode of vibration. Therefore it is important to ensure that this overtone sounds at the appropriate frequency, or the marimba’s characteristic timbre may be lost.

Fig_5

(http://faculty.smu.edu/ttunks/projects/merrill/Mar_6.html)

Screen Shot 2015-04-15 at 4.16.29 pm

Above is the spectral analyzation of my marimba made in sculpture using logics pre fade EQ analyzer. The root note that is being played is a C4 and is dominant at 500hz. According to the overtones created by the marimba, the most significant overtone frequency is at 2kHz which is twice the octave above the fundamental (C6).

It is also notable that Marimba often feature resonators which increase the dynamics of the fundamental and the overtones. Each resonator strengthens the fundamental both by its own resonance as well as its production of one half of all overtones in that resonance. Above there are frequency present at 4150Hz and a overall presence around the 1kHz and would indicate resonators are being used.

Screen Shot 2015-04-15 at 4.58.26 pm

As for the capturing, i decided to capture the strike as the main fundamental frequency and the strike as the overtones, positioning them relatively spaced apart so that it is capturing most of the body of the sound whilst also maximising VeloSens to utilize more velocities whilst inputting midi.

This is similar to striking different areas of the bars since striking the centre of the bar will primarily produce a sound with more frequencies and so for the sake of replication, ive decided to make this the basis. The more frequencies that are presents

Screen Shot 2015-04-15 at 5.05.27 pm

As for the envelope, ive set the attack to fast since the marimba is inherently a mallet instrument, most of the dynamics and plucky nature comes from the initial sound. Ive set the sustain to max and the release to medium so that the tones play for the maximum dynamic whilst it fades away relatively fast.

Avicii – Wake Me Up (Track Analysis)

Wake Me Up” is a song by Swedish DJ and music producer Avicii and features vocals by Aloe Blacc and acoustic guitar by Incubus’ Mike Einziger. It was released on 17 June 2013 and reached number one in 22 countries, including Australia, New Zealand, and the United Kingdom. The song is a cross genre between Country/Folk style and incorporates EDM elements to it.

Track Analysis

Screen Shot 2015-04-13 at 2.02.13 pm

Intro

The introduction starts with 4 bars of acoustic guitar which uses extensive use of hard panning to widen and differentiate the two guitar parts that play an exclusive patterns from each other.  There is also an the EQ sweep at the end of the 4th bar to transition into the first verse

Verse 1

The first verse is incorporates vocals. The vocals are panned centre and features very light reverb plate reverb which is very popular in the use of country. This verse musically starts in a very country oriented direction, but there is another filter sweep which opens towards the first part of the verse.

Chorus (Acoustic)

The chorus begins incorporates 4 to the floor rhythm tropes that is typical in many dance tracks. there is also a clap on every off beat which is panned heavily towards the left and right and the kick which is primarily towards the centre.

The kick itself follows a very fast attack and fast release envelope and is inherently very punchy. There is not much sub bass frequency, however it is dominant in the mid frequencies which could emulate something like the sound of a kick drum skin.

The instrumentation stays the same as before and the nature of the acoustic guitars and the lead vocal keep the Country/Folk vibe that was established during the previous sections.

Build (Instrumental Break)

White noise is used as a sweep to introduce the synth orientated section of the second chorus. A lead guitar is introduced which is used as a build up and there is post processing such as distortion and delay to recreate the sound of a plucky synth. There is also an introduction of a low passed saw wave pad to indicate that the next section will be more electronically orientated.

There is EQ filter sweep and cymbal at bar 43 which ends in a and an addition of another synth pad. In bar 45 the bass and kick There is another EQ filter sweep at bar 52 and bar 60.

Chorus (Electronic)

The chorus for this section is more electronic orientated and features an addition of a lead saw synth and an electronic pad to replace the acoustic guitars. To provide the whole energy for this track there is a bright heavily side-chained white noise as well as the tails of crash cymbals to provide variety. The previous pad synth from the build up is also heavily side-chained to provide dynamic changes to accentuate the kick that is being played.

As for the lead synth, it replaces the previous lead guitar line from the previous section and a saw pluck is being played instead. The synth it self is also a monophonic synth since there is an audible pitch bend to different pitches. The thickness of the synth probably comes from the use of a chorus modulator and a dimension expander to widen it.

Verse 2

The synths are faded out in bar 61. The verse begins with vocals and guitar and the same processing is used from the previous verse. However, the only difference is the incorporation of hi-hats 8 bars into this section.

Bridge

This following section is basically a re-iteration of the previous half of the section with a short 8 bar verse, an 8 bar acoustic chorus and an 8 bar build up.

Verse

The verse part is a direct copy of the acoustic chorus from the previous part but there is a the use of a white noise sweep to introduce the next 8 bars.

Chorus

This section is also the same as the previous section however there is an addition of a heavily side-chained white noise to create more energy in the track.

Build-Up

The build up starts with a heavily delayed crash as well as the overall section is mostly made up of the a wet reverb and has no dry signal whatsoever. This section is low passed and more higher frequencies are slowly introduced for the instrumentations. However, the vocals are mostly dry and is the only track that plays its full frequencies so that it sticks out in the mix.

Chorus

For the first 8 bars of the chorus, there is a lack of higher frequencies from the lead and white noise. However most of the higher frequencies are provided by crowd noise foley which is heavily reverbed so that it sits in the background. As the 8 bars progresses, more of the lead synth frequencies are provided and in the end there is a high pass filter sweep to indicate the build up.

There is no noticable difference from the first electronic orientated chorus section. However, There is audibly a more distorted sounding noise from this section which could suggest a bit-crush is being used in the synths or the percussions.

Outro

The outro is comprised of the reverb tail of the chorus section and is mostly the lead and the pad.

One More Time – Daft Punk (Analysis)

“One More Time” is a song by electronic music duo Daft Punk, first released as a single on 13 November 2000 and later included in the 2001 album Discovery.

History of French House

French house is a term for house music produced by many French artists, a popular strand of the late 1990s and 2000s European dance music scene and a form of Euro disco. Celebrated and successful purveyors of this music include Daft Punk, Air, M83 and Justice. Most tracks in this genre feature a four on the floor timing in the a tempo range of 110–130 beats per minute.

The defining characteristics of the sound are are filters and phaser modulation on samples from late 1970s and early 1980s American or European disco tracks. Early house music was generally dance-based music featuring repetitive 4/4 beats, rhythms mainly provided by drum machines, off-beat hi-hats, and synthesized melodies. While house displayed several characteristics similar to disco music, it was more electronic and minimalistic.

With the musical influences of funk and soul and the combined versatility and practical dance nature of house, the audiences of french house are both said to be a culmination of Disco and early house music. Daft Punk reached significant popularity in the late 1990s house movement in France and met with continued success in the years following, combining elements of house with synthpop.

French House is made up of a variety of different genres. one of the styles is heavily influenced by a genre commonly known in by the french as space disco. Space disco can be described as disco music with a futuristic mis-en-scene. This genre came to popularity in the 1970s and explored the ideas of outer space. Most of this aesthetic included futuristic robotic humanoids,laser illuminations and bright flashing lights to simulate being in a control centre of a space ship.

This science fiction theme is apparent in most Daft Punk tracks and is no exception in “One More Time”. For example the use of vocoded/phased vocals would suggest that there is a mechanical and almost robotic representation towards their music.The effect created by a phaser is often used to imply that the sound is synthetically generated, like turning a natural human voice into a computer or robot voice. The technique works because the frequency filtering produces sound commonly associated with mechanical sources, which only generate specific frequencies rather than a natural source.

Space disco can also be described by the virtual landscape it was trying to recreate. Since outer space was the main aesthetic they were going for, the use of large hall reverbs were mostly used for lead synths or even breakdown sections. The use of the large reverb is indicative to the vast and expansive nature of outer space since virtually, a long reverb with a long tail can be associated with a being in a large space. This is apparent in the song “One More Time” where the melodic nature is stripped back for almost 2 minutes of a breakdown where there is nothing but a single layer of synth with the vocals, both heavily processed with reverb. This section can also be indicative of the lonely/eerie nature of space since nothing can be found.

Another common use in french house is the extensive use of filter sweeps using cutoff via high or low pass. This is apparent in the second genre that heavily influences their sound which is euro disco. Euro disco is a variety of electronic music that implements more of a pop/new wave aesthetic and is commonly accompanied with bright synths. Since the use of synths was more common, the use of filter sweeps were more apparent. Since psychedelic was a genre that has heavily influenced early disco, the use of phasers and sweeps could be a synoptic and cultural reference to drug culture since cocaine was a heavily demanded drug during the prime of disco in the 70s. The use of spectral modulation could emulate the sensation of possibly being under the influence of these hard drugs.

There is often a strong emphasis on extended instrumental solos or jams, typically featuring a heavily distorted lead such as a guitar or synth as the main instrument. Once again this can be directly linked to the 2 minute instrumental break in the song.There’s also a considerable amount of resonance at the ends of the filters. This gives the sweeping sound when the cutoff frequencies are changing rather than just cutting out the frequencies as it passes.

The fashion in this scene was mainly themed similarly like glam rock with an abundant use of bright flamboyant colours  and bright visual styles. This has obviously influenced daft punk’s whole aesthetic of wearing futuristic helmets with bright leds. Daft Punk have said that they donned their robot masks to easily merge the characteristics of humans and machines. Sampling often brought new life into old recordings and with the age of affordable samplers and synths, live studio sessions were not viable for most of the emerging bedroom producers who had a fondness of the genre. Most of the warm sonic characteristics of the old eps could not be recreated at the time using software and so, sampling was a common practice amongst produce

“One More Time” contains a sample of “More Spell on You” by Eddie Johns. This section is mainly built from the transient brass shots and is beatmashed in varying timing from quarter beats to eight beats.

Screen Shot 2015-03-23 at 7.11.44 pm

Intro

One more time starts with the a high passed melodic hook which is was the sample previously stated above. At the end of every 8th bar the sample is beat-mashed to every quarter beat. A vocal hook of “one more time” is then introduced every 4 bars which features a heavily autotuned quality to it. It could also be a vocoded effect which is carried using a saw lead to create a robotic characteristic to it. A heavily compressed bass is introduced and is sidechained to the four on the floor kick.

The percussions feature the use of a shaker and hi-hats and is also high passed along with the rest of the section. there is also a very metallic white noise sound which could be the after effect of the use of bitcrushing upon the percussions.

Chorus

The main vocal line is introduced and is heavily modulated using a phaser. The vocal also features the use of a ping pong delay or tremolo so that it slowly pans from left to right.The Since space disco was a great influence on them the washing of the vocals references the overall 80s disco movement where most of the spectral characteristic is phaed in and out to create a very trippy experience. This section loops for another 16 bars before the breakdown

Breakdown

The breakdown features a slow attack sine wave pluck which is panned to left. Most of the spectral elements such as the low end bass and high end percussions are still present. The vocal hook is also present. However this section only lasts for 4 bars until the middle 8.

Middle 8

The middle 8 is a long 2 minute section of the song where most of the punchy rhythm and funk elements are stripped for a more synth-orchestral section. There is an organ which plays the root chords and provides the only melodic content for a whole minute. A shaker is introduced after 16 bars and provides the back bone of the section and is eventually high cut after 8 bars. The melodic hook sample is eventually high passed unto the final section of the song. The song continues for another 16 bars until the end and is mostly a re-run of the chorus.

Summary

French house is repetitive in nature often reusing the sample over and over again with various effects layered as to not verge into repetitiveness. However with varying moods such as the binary opposition between the up tempo funk vibes and synth washed orchestral middle 8 section gives listeners space to breathe and relax. At the end of the day most of this music is catered towards being played in a club and so there is enough variation in energy for it to be successful when played with a dancing crowd in mind.

Firestarter – The Prodigy (Track + Cultural Analysis)

The Prodigy are an English electronic music group from Essex formed by Liam Howlett in 1990. Along with The Chemical Brothers, Fatboy Slim, The Crystal Method and Orbital and others, The Prodigy have been credited as pioneers of the big beat genre, which achieved mainstream popularity in the 1990s and 2000s.

The group’s were well known for various genres ranging from rave, hardcore techno, industrial, jungle and breakbeat in the early 1990s to big beat and electronic rock with punk vocal during the progression of the band.

The Prodigy first emerged on the underground rave scene in the early 1990s and have been called “The Godfathers of Rave”.

Cultural Analysis

Since The Prodigy were prominently influenced during the 80s Punk timeline with bands such as the Sex Pistols and The Clash, the track itself features very harsh vocals that reenacts more of the DIY screaming and shouting aesthetic that was dominant with punk, compared to traditional musical singing. Even the lyrics and chord progression are very repetitive and simple in nature, similar to that in punk music at the time. The simplicity of the lyrics provided a very clear message however the lyrics were often vague. Paired with the repetitiveness nature of the genre, it made sure that it was catchy and simple to remember.

The prodigy has even gone out of its way to make sure that “Firestarter” would not reach mainstream popularity by rejecting publicity from interviews and billboard top lists. This itself promotes the general idea that Rave Culture was meant to be elusive and enigmatic. Most record labels that published this genre, promoted the ideology of listeners actually going out of their way to find music and not conform to mainstream music outlets such as “Top of The Pops” or “MTV hits”

Punk, just like rave originally took place in local scenes that tended to reject association with the mainstream. An associated punk subculture emerged, expressing youthful rebellion and characterised by distinctive styles of clothing and adornment. Even in the music video, the physical representation of Liam is reminiscent of Punk bands like the sex pistols who often portrayed themselves with mohawks, make-up  and jewellery such as earrings and chains.

Since rave culture was meant to be an anarchistic revolt against mainstream culture and governmental establishments, the lyrics themselves are usually open for interpretation. For example, Liam can be seen wearing a sweater with the U.S.A. flag on it, claiming that he is the fire starter and the instigator. This could be a nod the U.S. and how they were seen who starts many of the wars of the world during the time.

The music video is set at Aldwych tube station which is a closed station formerly on the Piccadilly Line of the London Underground. The aesthetic closely resembles the whole rave scene accurately since most of the genre were being played in abandon factories or establishments.

Song Structure

Screen Shot 2015-03-23 at 7.46.02 pmEven looking from the song structure it self, its obvious that it even reflects the whole violent and restless nature of the genre. There is only a 30 seconds interlude, compared to 3 minutes of fast paced sections where it has a more agressive and driving beat. compared to many western pop structures, this arrangement is not foreign to dance music and most genres within this tempo like Drum and bass,techno and acid take from this.

Intro

The song starts off with a drum pattern that is slowly introduced via a low pass. Filtering is a common FX used within this track as most of the melodic and rhythmic content is slowly introduced this way.

There is also a drone bass that is being played in the background which plays a prominent role in all the song. The drone bass is a slow attack saw bass that is heavily phased and low passed so that it sits behind the mix and works to glue the harsh synths with the vocals.

It Is also here where the main guitar riff is introduced. The guitar is processed through a wah-wah pedal which is panned towards the centre with a small delay.The looped wah-wah guitar riff in “Firestarter” was sampled from The Breeders’ track “S.O.S.” from the album Last Splash. Sampling overall is a very prominent occurrence in electronic music, and the members are even acknowledged in the track credits.

Pre Chorus

Most of the percussive frequencies are introduced at this point and is more of a build-up towards the chorus. The main backbone of the rhythm section is the kick that is being played every 4/4. The kick itself features a lot more mid and high end frequencies due to the fact that it pierces throughout the mix and is rather barren in the sub bass frequencies.

There is also in the introduction of a phased noise which acts as the crash. This phased noise can be heard as a reversed crash and is heavily distorted but is mixed relatively quite so it sits in the back of the song.

The big beat rhythm comprising of the snare and the 16th hi-hats provides the whole energy of the track and covers most of the mid and high end frequencies of the spectrum.

To transition to the main chorus, there is a vocal vowel being reversed that is slowly panned from right to left. Reversing synths or vocals are a common trope in electronic music to seamlessly transition to different sections. similar to how an anacrusis would be used for more traditional music.

Chorus

Most of the rhythmic and melodic content from the previous section is transferred to this section. The big addition is the vocal hook which is accompanied by a 1/4 delay which repeats the last words of the line.

However there are also minor additions such as an extra reverse synth on every offbeat and an addition of a vocal sample. There is also a reversed synth with a slow attack which closely resembles a tire screeching which pans to the left. There is also additional “Hey” samples that triggers every end of the bar which is heavily delayed and reverbed in the track. This sample will be very prominent in the entirety of the song.

Verse
The Verse is an instrumental section which closely resembles the Pre-Chorus in terms of instrumentation however it strips backs the vocals and primarily features the synths. There is also an addition of a gated pulse synth which is slowly high-passed in to the section.

Middle 8
The structure pretty much repeats it self twice before reaching the middle 8 section where most of the harsh tones are stripped for a more melancholic and softer sounding synth pads.The most prominent feature here is the phased out acid lead. Along with the lead, the drum patterns are also phased in and out. The phasing is most likely automated in and out via a cutoff which is mapped to a sine wave lfo. As this section goes along, a heavily distorted stab synth is introduced as well as the reverse screeching synth to help build up the tension within the track. The track ends with another instrumental section which lasts for 8 bars and the dynamics are faded out towards the end.

Distortion

In this blog i will compare the use of digital and analog distortion and analyse the sonic characteristics of running a sine wave through them.

Digital Distortion 

I will be using logic stock distortion plug in sets and analyzing them over a spectral analyzer of Logics stock EQ plugin. I will use a basic sinewave that is playing at 400Hz which is being triggered by logics stock TestOsc.

Bitcrusher

By applying digital distortion to a sinewave such as a bitcrusher the wave can be seen to morph from a sinewave to a squarewave.

Screen Shot 2015-03-16 at 6.06.15 PM

Ive set the clip level so that once it reaches 0dbfs it will have a sharp cut at the top almost flattening the peaks and throughs. I have used this setting because it is the most common way of digital distortion since it will not play anything that is clipped at the 0dbfs threshold.

Looking from a post analyzer EQ, more frequencies and harmonics are added when a signal is distorted. However the fundamental frequency of 400Hz is still the same.

With no gain boost

Screen Shot 2015-03-16 at 6.09.00 PM

With 3.5 dB gain boost

Screen Shot 2015-03-16 at 6.09.37 PM

With 12 dB gain boost

Screen Shot 2015-03-16 at 6.09.12 PM

In terms of subjective analysis, the square tone is more harsher but also more brighter compared to the sine wave. There is also a difference in perceived loudness since the square tone emits a much more louder noise but dynamic metering would still read both tones capped at 0dBFs.

Limiter Distortion

Running a sinewave through a limiter such as logics Adlimit achieves the same results however, the percieve loudness is not as harsh as running it through a bitcrusher.

I ran the same sinewave through a 22dBfs gain inside a limiter.

Screen Shot 2015-03-16 at 6.22.21 PM

And here is one running at 44dBfs, double that of the first one.

Screen Shot 2015-03-16 at 6.22.30 PM

even though there is a 44dBfs boost, it is still not louder than the same wave boosted through a 12dBfs bitcrush distortion. One reason could be because the bitcrusher reduces the resolution of the audio as well as boosts the gain, and the more quantization you can hear, the more harsher it would sound, thus the more fundamental it creates, thus their is a perceived loudness.

The perceived loudness could also just just be due to the way logic’s coding works.

Analog Distortion

For these analog tests, i paired up with my peers Jordan Forrester, Jackson Martin and Joshua Graham. The assets were shared around Google Drive.

For our first analog distortion we played a 192 Hz Sine Wave, Inserting the JLM LA500A Compressor into the Channel and Increasing the Makeup Gain to point of sonic distortion.

Screen Shot 2015-03-16 at 6.46.57 PM

Towards the halfway point of the make up gain pot, it starts to distort and play its fundamentals.

Screen Shot 2015-03-16 at 6.47.00 PM

when it has reached the halfway point on the Makeup Gain it slowly loses its harmonics but, increases in buzz and noise from 5kHz to 20kHz, making for an undesirable effect.Screen Shot 2015-03-16 at 6.49.36 PM

Here is the video for the makeup gain overload on the outboard compressor.

https://drive.google.com/a/student.sae.edu.au/file/d/0B5kxHx5sAoxyX3pnN3NRSVhiLUU/view

Input Clipping

We also tested microphone clipping. We did not use a tone but we had used Jackson Martin’ scream and fed it through the outboard gear in different gain, one at -5dBfs and one at 0dBFs.
The mic used was an SM57.

Screen Shot 2015-03-16 at 7.07.38 PM

At low levels it was not noticeable but if enough gain was introduced, more crackle was heard. The noticeable difference is that when the gain was boosted more, lower frequencies and higher frequencies are introduced to the audio.

Screen Shot 2015-03-16 at 7.07.41 PM

The crackle could be due to the way the mic is built and how much air pressure the diagram could take but was not noticeable with a lower gain. It could also be due to the way the outboard processor could artificially create these extraneous sounds due to the electronics inside was manufactured.

Track Analysis, Porter Robinson – Language (Original Mix)

Language is a Progressive House track produced by Porter Robinson which features vocals by Heather Bright. The song was uploaded on YouTube by Porter Robinson on March 30, 2012 and received number 1 in the UK indie charts and number 3 in the UK dance charts.

The track incorporates many tropes from Trance and euro dance such as time signature, structure and instrumentation. I used Phase cancellation within Logic X to compare between different segments so i could pick up different sounds that might be less prominent since the second half of the song is just duplicate of the first.
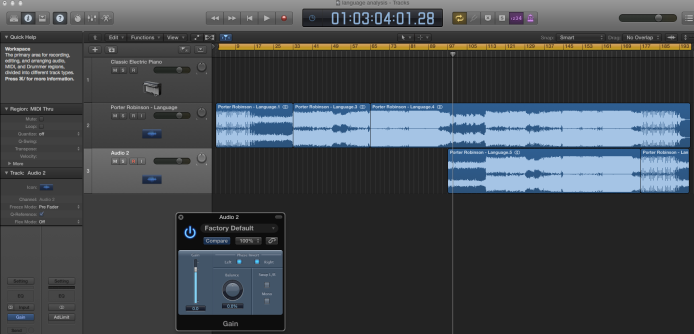
Screen Shot 2015-03-04 at 3.10.17 pm

Song Structure

Screen Shot 2015-03-04 at 3.12.01 pm
Intro (Bar 1 – 16 , 0:00 – 0:30)

The first segment starts off with a percussion loop with a kick on every 1/4, a snare on every 1/2 and toms in between ever kick and snare. the only exception is in the last bar where the kick is muted leaving the tom and snare to play.

There are also hi-hats which play every 1/4 and a heavily reverbed and delayed crash which decays overtime until the end of the segment. it is also worthy of note that the crash is also sidechained every 1/4 and overtime, the sidechain wetness increases to the point where the last bar without the kick, the crashes provides the overall beat instead of the kick.

In the drum bus itself, there are two notable Fx processing that is being used. The first is Bitcrushing. The percussions such as the toms and kick have a very metallic high end to them and it is almost recreating the very early days of 8 bit music where percussions were made using saw waves and white noise. The second notable Fx is the heavy use of reverb. Certain percussions like the snare uses a smaller reverb with a shorter release and the cymbals use a far more larger Reverb space with a longer release time. The kick, snare and toms are also panned heavily to the centre whereas the hats were panned hard left and right. This gives it an overall vastness and the perception that it is set in a large space but the focal point is the kick, snare and toms since it is in the centre.

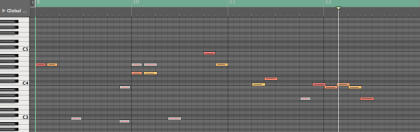
Verse 1 (Bar 17 – 32 , 0:30 – 1:00)

The two notable instrumentations in this section are the synth plucks and the heavily reverbed piano in the background.
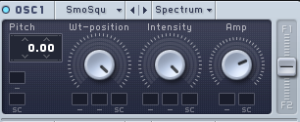
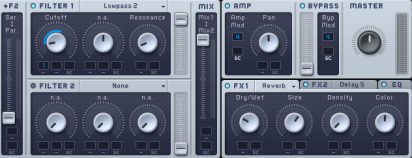
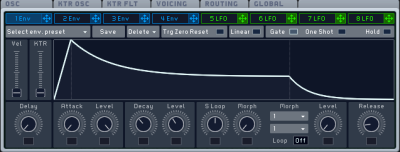
The pluck is a mix of 3 saw waves in unison and detuned to give it a chorus effect. There is a low pass filter being applied to the synth since there is is almost no harsh top end noise that 3 unisoned saw waves create, and it is a much smoother sounding synth with heavy emphasis on the mid and the lows. The envelope for this synth has a fast attack but it has almost no sustain and relies heavily on the decay and release. this gives the synth a plucky sound and would probably be a pad if the sustain was boosted.

There are also piano chords being played in the back which is heavily reverbed to the point where there is almost no dryness to it and most of the sound comes from the wet reverb itself. The reverb release is also very long almost reaching 3-4 seconds.This makes the piano sit well in the far back if the mix whereas the plucks are the main focal point to this section.

There is also a pitched saw lead which rises in the last bar. White noise is also slowly introduced via high pass for the last 4 bars.Both of these create tension for the track to break it up from the calmed section into a more hectic section.

Pre-chorus (Instrumental) (Bar 33 – 48 , 1:00 – 1:30)

In this section a saw wave lead is introduced which in which heavy amounts of distortion is being applied to the overall sound. There is also white noise being applied to the the synth which gives it more energy and grit to the overall sound.

There is also a phased pad which runs in the background which also takes the same synth from the lead but it runs as a whole note chord compared to the broken lead that is being ran in 1/8.

There also seems to be a timestretched lead in the background which almost sounds like a scream. This is the only notable stem with a heavy amount of reverb compared to the saw wave synth which is rather dry and direct.

Pre-chorus (Build Up) (Bar 49 – 64 ,  1:30  – 2:00)

In this section the build up incorporates many aspects from the previous section such as the synths and the heavy amount of distortion. However the composition is stripped down and there are new tracks added in

The first notable one is a lead synth with its pitch is being automated using a slow attack envelope. The second is another heavily bit-crushed synth which is being automated using the same setting. these synths recreate the sound of a siren and as the section goes on, more white noise is highpassed into the synths to build up a sense of tension and energy in the track.

Chorus (Bar 65 – 96 , 2:00 – 3:00)

The Chorus is a recreation of the pre-chorus in bars 33-48.
In terms of spectral morphology, there is a noticeable difference towards the low end of 200Hz and below compared to the pre-chorus where it is more dry and missing a lot of its low energy.

The big difference is the 4 to the floor kick that plays during the this section. The kick is a very punchy low end kick with a heavy emphasis towards 40-80Hz.

In terms of synth, the chorus has an addition of a sine-wave sub bass which plays the root note. The overall section is heavily side-chained compressed in terms of dynamic towards the 4/4 kick where as the kick plays, most of the musical contents is ducked down.

Screen Shot 2015-03-10 at 4.23.28 pm

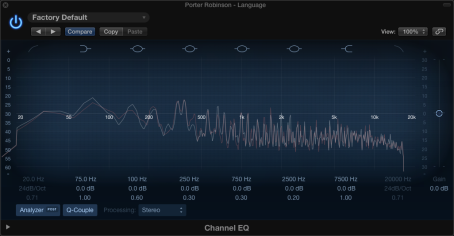
(Pre Chorus Post EQ)
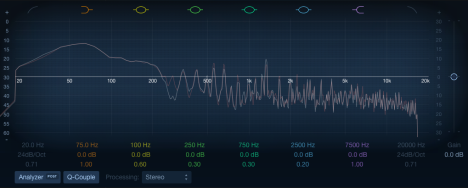
Screen Shot 2015-03-10 at 4.23.37 pm

(Chorus Post EQ)

Verse 2 (Vocals) (Bar 97 – 112 , 3:00 – 3:30)

There are female vocals being tracked in this section. In terms of space, there is very little reverb being applied to her voice. This gives the connotation that the vocals are right in front of the listener while most of the music is sitting at the far back.  if there was too much reverb, there would not be a centre of focus and the vocals would meld with the overall track.This could also be due to the track aesthetic. for a whole minute during the track there are no human elements to the song and so too much reverb could also be lost within the track. putting too much reverb would lose its more personal touch with the listener since its as if she is in front talking to you rather than an ambient voice in the background.

The most interesting part is towards the last bar of the verse, the vocal reverb is actually automated to increase to the point where it merge with the chorus. Ive stated that the in the previous pre-chorus there is a “scream” like sound which could just be the reverb tail dying off and merged to sound like a synth.

Repeated
Pre-chorus (Instrumental) (Bar 113 – 128 , 3:30 – 4:00)

Nothing new added from previous Pre-chorus

Pre-chorus (Build Up) (Bar 129 – 141 , 4:00 – 4:30)   

Nothing new added from previous Pre-chorus

Chorus (Bar 145 – 176 , 4:30 – 5:30)

Nothing new added from previous chorus, other than it is stripped in terms of percussion and low end energy in the last 4 bars.

Outro (Bar 177 – 194 , 5:30 – 6:03)

The outro is a duplicate of the intro.

Subtractive Synth Excercise

For this entry i will be exclusively using Native Instruments Massive to make 3 distinctive sounds to use for my Electronic Music Production and i will explain my processes and also my influences on how i got the sound.

Lead Synth

For the lead synth i wanted to recreate the tone of a nylon string being played on a classical guitar whilst adding a more synthsized sound to it.

To start off, i made a lead synth using a basic square wave and I set the wavetable to spectrum.

Screen Shot 2015-03-05 at 6.11.30 PM

Most of the the plucky nature of these strings come from its very sharp attack and so i automated the lowpass cutoff frequency towards a spare envelope which looks like this.

Screen Shot 2015-03-05 at 6.20.11 PMScreen Shot 2015-03-05 at 6.20.34 PM

The sharp attack makes sure the nylon-ish tone kicks in quickly. However the decay is what sets the tone for the overall sound since there is a slow drop off in decay and a low sustain, it emulates the vibrations from a nylon string dying slowly and also makes sure the tone doesn’t linger for too long.

I also applied Reverb and Delay to the track to emulate the feeling of a large environment and to compliment the overall vast feeling of the track.

The notes are very minimalistic and only plays the root notes for each chord on the pad.

Screen Shot 2015-03-05 at 6.09.49 PM

Pad Synth

There was no initial inspiaration for the pad synth however i wanted to create a low passed reverberant pad which can capture the sense of emptiness and vastness.

Now the pad synth is far more complex than the Lead synths since it is a mixture of a pure sine wave, a mixture of sine-square and Massive’s exclusive crush oscillator.

 Screen Shot 2015-03-05 at 5.45.24 PM

The big difference is that the sine waves dynamics are being automated using performers. These performers create a stutter effect since the oscillators are a sharp saw waves with a quick attack.

 Screen Shot 2015-03-05 at 5.46.12 PM Screen Shot 2015-03-05 at 5.46.19 PM

now the rates for these performers are being controlled by an lfo with a half dry half wet setting so that the stutter effect will only be a tiny bit audible and the pad also plays the same time together.

Now the LFO is a simple sinewave which is triggering the rate of the performer and it is also making sure the pad isnt monotonous and more flowing.

Screen Shot 2015-03-05 at 5.46.30 PM

Now to make sure the synth isnt harsh i applied 2 filters.The Scream filter applies a low pass on the pad but also adds brightness to the tones that arent passed.
The high pass simply removes alot of the low end rumble and sub frequencies whilst keeping the warm mid tones.

 Screen Shot 2015-03-05 at 5.45.34 PM

I applied very wet reverb and delay fx to match the same large acoustics as the lead synth.

Screen Shot 2015-03-05 at 5.46.08 PM

Screen Shot 2015-03-05 at 5.48.29 PM

Sub-Bass Synth

The sub bass synth is a simple sine wave that is transposed 2 octaves down.

.Screen Shot 2015-03-05 at 7.19.32 PM

Since sub frequencies are more fiddly than other range of frequencies, i wanted to have total control of how long the sub is playing and when it should stop. The envelope is a very quick attack, high sustain envelope with a very sharp release making sure it does not sustain for too long. Screen Shot 2015-03-05 at 7.01.19 PM

Ive also set the voicing to monophonic legato so that there is a glide between different keys rather than a sudden shift of notes.

Screen Shot 2015-03-05 at 7.01.25 PM

Screen Shot 2015-03-05 at 7.03.00 PM

This is how the overall tracks sound together

Quiztones

 Quiztones is a frequency training tool for musicians, producers and engineers,to develop and refine a more precise listening and frequency recognition skills.

The first quiz lets you test your ability to pick up certain frequencies just by listening to sine waves of varying frequencies.

A tone is played and you have to choose which tone corresponds to the frequency being played.

Screen Shot 2015-02-25 at 2.21.23 pm
Screen Shot 2015-02-25 at 1.28.51 pm

However there are harder options to chose from like a quiz to identify frequencies from 1/3 octave bands, similar to those of a graphic EQ. This can be great to pick up certain frequencies in a live sound setting.

Screen Shot 2015-02-25 at 2.22.19 pm

Screen Shot 2015-02-25 at 1.37.40 pm

There is also a quiz that can identify Pink noise frequencies that is altered by dB. This can be potentially great since pink noise is noise that is inhabited by musical frequencies, it can be great to clear up muddy mixes or even accentuate frequencies in a track.

Screen Shot 2015-02-25 at 2.23.22 pmScreen Shot 2015-02-25 at 1.47.10 pm
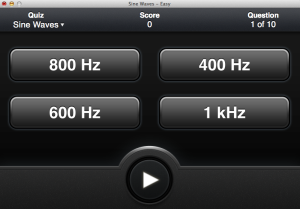
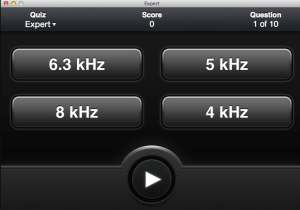
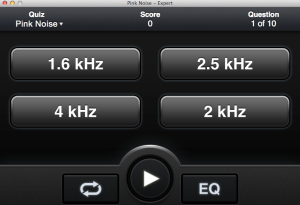
The general tip i used to be able to identify a certain frequency is to memorise one frequency from the subs,lows,mids and highs and compare it to the next one depending on the relative band it lives in.

Creating something

In the next following weeks, i will create a track and document the processes i have taken into creating said track. The planned track will employ both live audio and electronic music elements and i will go into every detail on how a patch was made to how the live audio aspects were recorded and processed.

I have decided to go for the a more soul/funk genre employing certain aspects from other genres such as chill trap,future bass and jazz. I have laid out a basic chord progression employing it in the Major key of F and in 110 bpm.

The chords progression follows a basic syncopated rhythm of FMaj7 – Em7 -Dm7

4

The following midi notes were played using a KORG microkey and inputted to midi channel 1. The notes were slightly quaintized in 1/16th using the mouse to achieve a sense of human input rather than a rigidly quantized set of midi notes.

Screen Shot 2015-01-21 at 7.25.13 AM

I have also taken the liberty to render out a 16 bar progression using KONTAKT’s New York Concert Grand sampler.

1

There were also some basic parameters such as Noise key and pedal that were boosted to achieve a more warmer and acoustic sound compared to a more midi sound that is expected from old casio keyboards. I have also decided upon using Logics built in Platinumverb reverb AU instead of using the built in reverb so that i could get more control on how i wanted the space to sound instead of one pot controlling a whole reverb parameter.

I wanted to recreate the room ambient from a tiny room so i only employed a 100% early reflections sound rather than have the reverb tail be dominant room sound.There is a very short 10ms predelay on the early reflections and i have chosen a medium sized room to achieve a sense of acoustic sound that would be achieved by a relatively enclosed small club. I have also changed the wet to be more than the actual dry piano sound to mix more of the ambient mics if a live setup was used.

2

I have also manipulated the piano chords by implementing a reverse reverb tail as a transition into the intro of the following 8 bars. I have bounced the piano progression into a new track but i have only bounced out the 100% wet reverb signal as a separate track. i then reversed the tail and made a fade out towards the end to avoid clipping sounds.

3

5